Photo: Englishsnow
All this week, Digital DJ Tips is dedicated to helping you to make better mixtapes. On Monday we showed you how to assemble a fantastic shortlist of tunes for your mix. On Tuesday, we looked at how to plan your mix. Yesterday we actually recorded it, and today we will look at mastering and burning your mix. Finally, tomorrow we’ll help you with ideas about how to get your mix out there to the people.
The whole point of this series is to encourage you to stop thinking about your mix and actually do it! So if you’ve followed this far, be sure to make it count. If you’ve already done your mix, great. If not, keep reading. There’s a whole weekend starts tomorrow evening, so why not put some time into recording a mix by Monday?
4. Mastering and burning your mix
Mastering basically means “making sound as good as possible”. Mastering in music production involves listening to each individual element of every single track you’ve recorded (bass, guitars, vocals, drums etc) and applying EQ, panning (left/right balance), compression, reverb/echo and other effects in order to build up a more coherent and better sounding whole, before apply some broad sweeps over the finished product to give it the final sprinkle of stardust.
Mastering DJ mixes
Mastering for DJ mixes can get complex too, but doesn’t need to be at all. The reason for this is that all the records you are mixing have already been mastered. And while some DJs swear by doing their own secret sorcery to their mixes, truthfully you really only /need to concern yourself with a few things:
- Are there any variations in track volumes?
- Is the whole thing loud enough?
(You’ll also maybe want to apply fades and edit blank space at the start or finish, but that’s really about it.)
Tagging and burning your mix
Once you’ve mastered your mix, it’s just a case of burning it to CD (with track listing if you wish), or preparing it for upload to a music service (which means adding ID3 tags to tell the listening public a bit about your mix should they download it).
Get some audacious free software
First thing to do is get some music editing software. Look no further than the free program Audacity – an open-source editing program that works for Mac, PC and even Linux. (Once you get it, you have to do one small thing, which is add an MP3 encoder to enable you to record MP3s. Follow the instructions here for how to do this.)
Open your mix in Audacity – it might take some time! You’ll see you a visual representation of the track, which you can skip through, zoom in on, play and generally inspect.
(Follow the basic help files if you’ve never used an audio editor before – it’s drag ‘n’ drop, cut ‘n’ paste stuff.)

Correcting a track that’s too loud or too quiet
Despite the advice given about volume levels in the previous article, it’s possible that you’ve been a bit loose with the gains and faders and somewhere on your mix there’s a song that is too loud or too quiet.
Never fear – with music editing software, you’re in a position to fix this. This is a three-part process:
- Locate the offending track in your mix – Usually you’ll have brought a kick drum in and it is too loud or quiet, and that’s what you notice when listening to the mix afterwards. Find where the loud track starts and stops to within a second or two. The “loud bit” (or quiet bit) may be from the start or end of a break to when the next track mixes in, for instance.
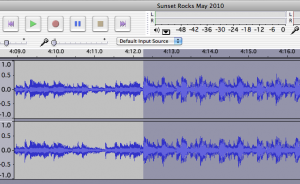
- Highlight precisely the area that’s too loud or too quiet – To do this, zoom right in and keep listening over and again until you find the exact right place, then click and drag (making sure you do it somewhere in the middle of the twin waveforms to get the left and right stereo channels) so your selected area marks the beginning of the zone you want to change. Zoom out, drag to near the end of the offending area by hovering over the right-hand side of the highlighted zone until the little pointy hand appears, then zoom in again, and fine-tune so the highlighted area ends exactly at the end of the bit that’s too loud/quiet. This is easier than it sounds – look at the pictures, try it.
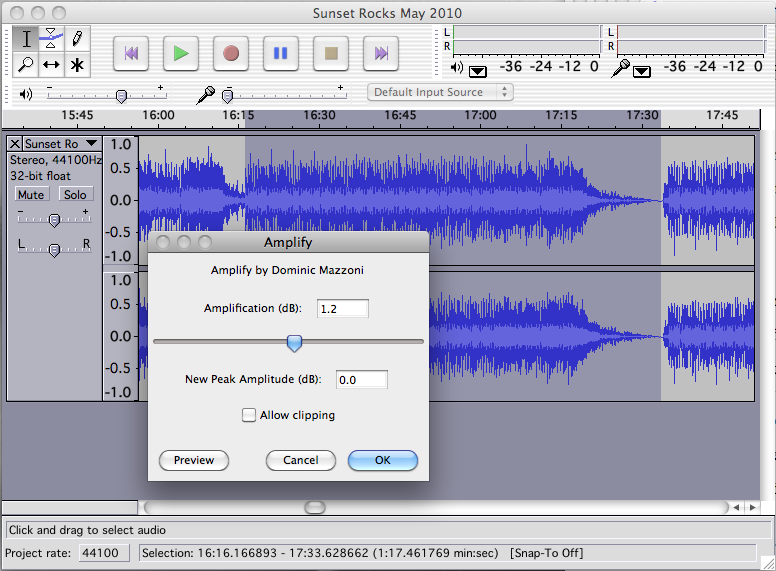
- Apply the fix – In the Effect menu there’s a plugin called Amplify, that lets you boost or reduce the volume of the selected part. Apply some reduction using the slider, then listen. Too loud still? Now too quiet? Or just right? You can undo any changes you make (Ctrl-Z for PC or Apple-Z for Mac), so don’t worry – experiment until you get it right.

Correcting the volume of the overall mix
This is even easier, and is called “normalising”. Just highlight the whole mix (Ctrl-A or Apple-A), the choose “Normalize” from the Effect menu. Keep the presets as they are, and let it do it’s thing. Done.
Editing blank space from the start or finish
You can probably guess this by now – highlight it, and hit “delete”.
Applying a fadeout
This is useful if you overshoot your allotted 60 or 80 minutes or whatever. It’s on the Effect menu too – highlight the zone you want to apply the fade out to, then click “Fade Out”. There are no options this time – it just does it for you.
Adding individual track titles
This isn’t strictly mastering, more preparing for burning to CD. It’s a good idea if you want people to be able to skip from track to track through your mix CD, and you can add track titles too so they see the track titles rather than “Track 1”, “Track 2” etc displayed on their CD player screens. No need to repeat Audacity’s own great tutorial on doing this, which you will find here.
Saving your mix
In Audacity, you “Export” tracks, you don’t “Save” them. (If you want to come back later to continue working on mastering your half-mastered mix, that’s when you “Save”, as Audacity will then save your mix ready to carry on editing it later).

Go to Export in the File menu (or Export Multiple if you’ve track listed your mix) and follow the options, exporting as a WAV or AIFF if you’re going to burn it to CD, or as a 320kbps MP3 if you’re going to upload it to the internet or otherwise distribute it digitally.
You’ll get a chance to add your ID3 tags here – however, Audacity’s handling of this is not too clever, so my advice is to open your exported MP3 in iTunes and edit them there. It’s things like Artist (that’s you!), Title (“Dubstep mix September”), Year and so on.
Burning the mix to CD
Using whatever burning software came with your computer (iTunes is fine), all you need to remember is that if you separated the tracks out in Audacity in order to label them and let people skip through the CD, ensure you set the CD to burn without any gap between the tracks.
To do this, just before you put the blank CD into your computer, you’ll need to change a setting in iTunes Preferences: Go to Advanced > Burning and set “Gap between songs” to “none”.
Nearly home and dry…
Well done – we’ve done a lot today, and we finally have a well thought-out, planned, recorded and mastered mix either on CD or ready to distribute digitally. That’s the subject of tomorrow’s fifth and final tutorial.
Check out the other parts in this series:
- The Definitive Guide To Making a Mixtape – Part 1
- The Definitive Guide To Making a Mixtape – Part 2
- The Definitive Guide To Making a Mixtape – Part 3
- The Definitive Guide To Making a Mixtape – Part 5
Have you got a “trade secret” for mastering that you want to share with us? Have you used mastering wizardry to pull around some dodgy mixes and turn them into masterpieces? Let us know!


![How To Build A DJ Music Library [Live DJing Q&A with Phil Morse] How To Build A DJ Music Library [Live DJing Q&A with Phil Morse]](https://cdn.digitaldjtips.com/app/uploads/2021/09/21014945/library.jpeg)
![How To Backup & Store DJ Music [Live DJing Q&A with Phil Morse] How To Backup & Store DJ Music [Live DJing Q&A with Phil Morse]](https://cdn.digitaldjtips.com/app/uploads/2021/09/21015724/storing.jpeg)
