The Lowdown
The Akai Pro Fire is a 16×4 pad controller for FL Studio, and is the first one made specifically for the popular DAW. It’s fun and works well, and is a good introduction to a hardware step sequencer workflow, just like you were programming drums on an 808 drum machine. It integrates tightly with FL Studio out of the box, though it’s decidedly niche because it doesn’t come with mappings for other DAWs. One for the FL Studio crowd who values hands-on sequencing control.
Video Review
First Impressions / Setting up
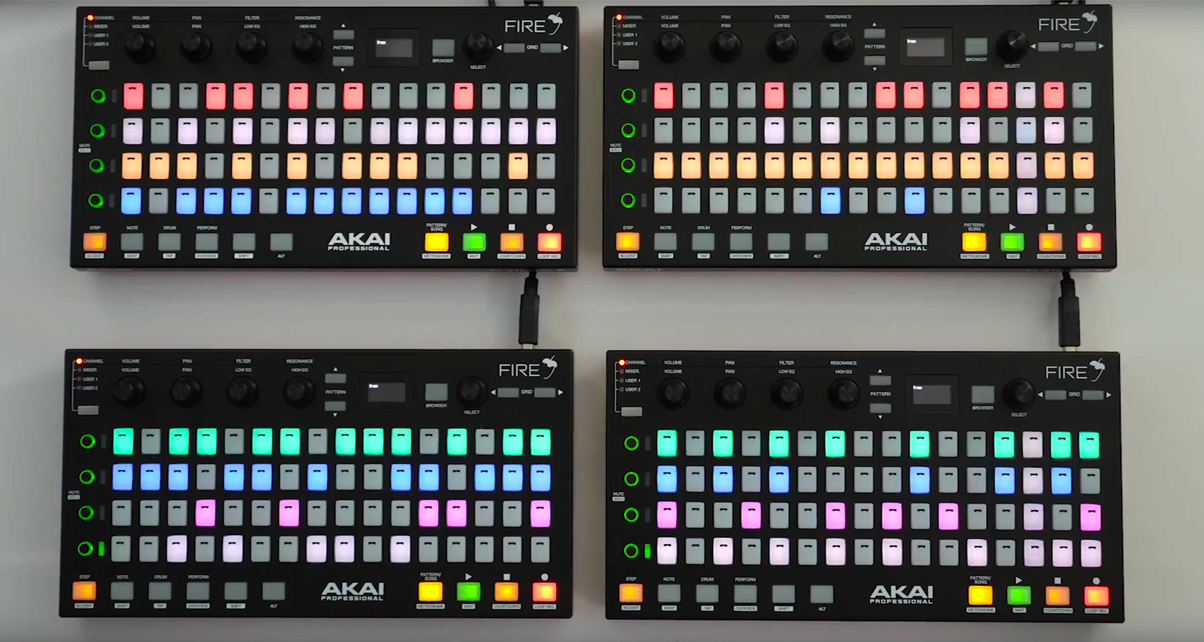
The Akai Pro Fire is a small desktop unit that connects to your laptop via USB. It’s got a 4×16 grid of pads laid out to look like FL Studio’s step sequencer, and they’re used to control up to four channels at once. It’s also got transport controls, four touch-capacitive rotary encoders with four banks (Channel, Mixer, User 1, User 2), pattern select buttons, grid navigation buttons, a browse knob and Browser toggle, and a small OLED display. There are also four modes; Step, Note, Drum and Perform (more on these later). It ships with FL Studio Fruity Fire edition to get you started making music straight away.
In Use
4×16 step sequencer pads

The Akai Pro Fire has 4×16 backlit RGB pads arranged to look like FL Studio’s step sequencer. This step sequencer interface is what you use to input drum hits, one shots and synth notes. In the past you had to use a mouse or trackpad in order to do that, and that process is the main thing that the Fire seeks to replace. The pads are responsive and it’s easy to see when you’ve entered a “step” because it lights up – the brighter it is, the higher the velocity of that step, and the dimmer it is, the lower the velocity. Holding a step pad down while moving a rotary encoder lets you change its parameters including velocity and panning.
If this is your first time using a step sequencer interface for plotting notes (or steps), it takes a bit of time to wrap your head around it: each step key corresponds to a 16th note by default, so you’re seeing one measure or bar of music at a time. Once you get used to it, it is much faster than clicking steps with a mouse and, admittedly, a heck of a lot more fun especially when you’re adding 16th note hi-hats.
Mixing
You can also use the Akai Pro Fire to adjust levels and panning for FL Studio’s channel rack which contains your sounds, synths and loops, and mixer which contains the Master output as well as your effect inserts. You do this by clicking the bank button, which changes the function of the four rotary encoders: selecting Channel lets you adjust the volume, panning, filter and resonance of a selected track in the Channel Rack. Selecting Mixer lets you adjust the Volume, Panning, Low and High EQs of the master output or any of the effect inserts.
You’re only able to adjust one channel, insert or the master fader at any one time. More advanced users might prefer to just use a mouse to make these adjustments because it’s faster that way.
Pad modes

The Akai Pro Fire comes with different pad modes that extend the functionality of the 4×16 pad grid. The default is Step, which lets you use the pads as a step sequencer. Each lit step equates to a note or a drum hit depending on what you’ve got loaded in the channel. Next is Note, which turns the grid into a three-octave piano (the white keys appear as white pads, black keys as orange pads, and green keys are your octaves). That means you can either pitch up or pitch down a sound (like a snare drum or percussion) or you can play chords if you’ve got a synth loaded like the Fruity DX10.
The next mode is Drum and this turns half of the 4×16 grid into two 4×4 pad grids that you can use for finger drumming and laying down beats in a more traditional MPC style. Loading the FPC drum sampler, for example, lets you trigger and record drum patterns just like you were using a drum pad, and it lets you access both Bank A and Bank B in the FPC instrument.
Finally, the fourth pad mode is Perform and this lets you trigger sounds and Midi clips using the 4×16 grid. You can use this for improvising in the studio or in a live performance setting. The clips loop indefinitely, and you can mute channels, solo them or stop clips by pressing an empty pad.
Conclusion

The Akai Pro Fire is a good controller for FL Studio enthusiasts, although those who are new to the DAW may find it challenging learning both FL Studio and using Fire at the same time. For this reason, we recommend that beginners learn using FL Studio on its own first – you’d be surprised at how much producing can be done with just a mouse and keyboard, and maybe a Midi piano keyboard controller (which is how FL Studio users have been doing it for years).
If you’re already using FL Studio and you love the idea of adding notes using a step sequencer, then the Akai Pro Fire is definitely something you should check out, especially if you’d like to explore the performance options that using the Fire gives you. Overall, a solid dedicated controller for intermediate FL Studio users. Recommended.


