The Lowdown
Most DJs don’t record their mixes. And really, they should. Recording your mixes gives you something to share with your fans, something to keep and look back on, or simply something to listen to in order to improve.
If for whatever reason you can’t just hit “record” in your DJ software (you don’t use DJ software, you want to record sets that contain streaming music…), EvermixBox 4 gives you a simple, reliable and effective solution, using a small piece of hardware and your phone to record and then share your mixes.
Don’t have our latest DJ gear guide? Click here to grab your free copy
Video Review
First Impressions / Setting up
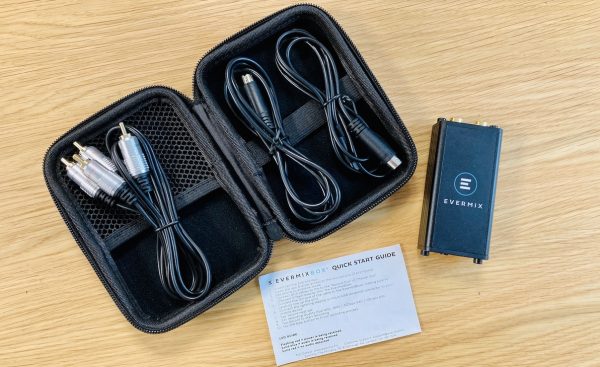
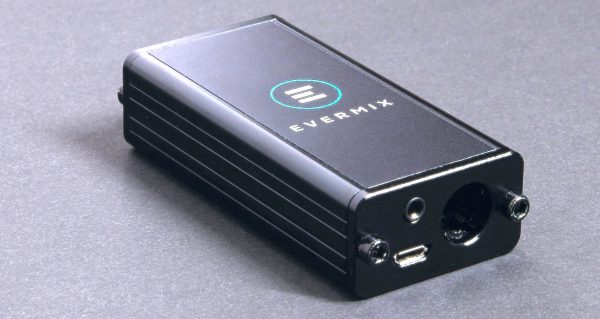
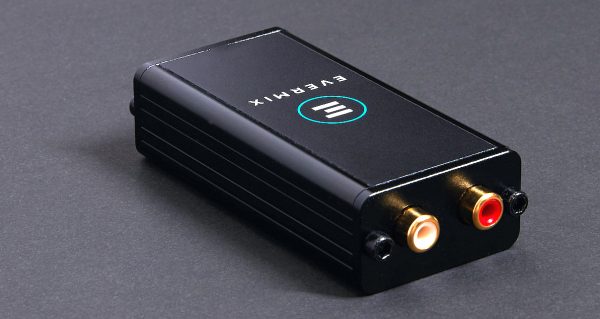
The EvermixBox 4 is a small metal box, with two RCA sockets on one end, and a few additional sockets on the other – the main one being for a proprietary DIN plug that you use to connect it to your iOS/Android device with one of the two provided leads.
The Evermix software, meanwhile, is an app you run on your iOS or supported Android device that lets you record, do simple edits to, and share your mix.

Inside the provided zip-up case, you also get an RCA-to-RCA cable, and the idea is that you plug this cable into a spare output on your DJ system.
On a club mixer, typically it’d be the Rec Out, which provides a suitable level for recording that isn’t affected by the Master or Booth Out level controls.
On a controller with two outputs (Master and Booth), typically you’d use one for your speakers, and one for the EvermixBox4.
Make perfect, pro-level DJ mixes every time: Pro Mixtape Formula
There is a micro-USB socket, which you can use to provide external power to keep your phone charged when you’re using the unit, which is a nice touch – although the EvermixBox 4 doesn’t seem to add too much strain on the battery, so as long as you’re fully charged you should have enough juice for several hours of set recording.

Finally, there’s an 1/8″ mic in socket, so you can record stereo crowd noise (assuming you have a stereo microphone handy, with an 1/8″ adaptor or plug). When you do, this is added as audio separate from the music, so you can fade it in and out as you tweak your mix after the event (or ditch it altogether if you want).
Setting up is really as simple as plugging it into your phone, hooking up your mixer or controller, and just hitting “record” in the app. But let’s dive a little deeper and discover some of the nuances of this set-up.
In Use
So once you’re set up and ready to go, you just hit “Record next set” in the app – which is also where you can see a list of your previous sets.
The app gives you the choice of recording WAV, or 192 or 320 AAC (at least it does on iOS – we didn’t test it on Android). I’d go for 320 AAC, and frankly I’d go for 256 AAC if it were an option, as both have always sounded great to my ears. WAVs will eat up your phone space, but obviously are the purists’ choice.
While there are no level meters, the LED on the unit glows blue when the level is OK, and flashes red when you are peaking.

There are absolutely no level controls in the app, because it auto-attenuates for you – this is by design, because the ethos here is to keep things simple so that more DJs actually use the thing.
It feels weird not being able to tweak the levels, but the recordings didn’t seem to suffer from it so the auto gain appears to do its job. You just make sure the output is nice and loud, but not too loud – just like when DJing, basically.
Read this next: How To Set Your Volume Levels Like a Pro When DJing
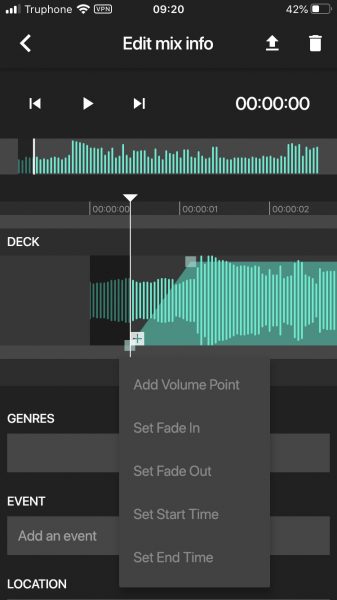
Once you’ve recorded your set, you can see a waveform of it, and also a zoomed-in version, from where you can listen to your set, and also from where you can perform a few actions:
- Set a fade-in point
- Set a fade-out point
- Set a start point
- Set an end point
- Add a volume point
By adding volume points, you can increase or decrease the volume of any parts of your mix – useful if you got a bit carried away and played a song too loud, for instance.
Once you’re done, you can add up to three genres to represent your mix, give the mix an event title, location and venue, and then immediately upload it to Mixcloud or SoundCloud, right from the app.

For me, more useful is the ability to share the mix from the app: You click the little arrow to right in the app, and it lets you choose whether to export the original or the exported version, and then you can share it as you would share any other file from your phone – for instance to Dropbox, iCloud, Google Drive and so on.
We tested it with an iPhone SE2, and the audio quality was awesome. However, just to point out that if you’re using Android, you may want to check it works with your device before shelling out the cash, as Android devices can vary with how well they work with such hardware, and this unit specified OTG support, running Nougat 7.0 or above.
Also, we learned that for iOS, it is currently Lightning-only, so no recording your mixes via USB-C to iPad Pro.
Using it for other purposes
As this is basically an audio interface, you can use it in several other ways than with its provided app:
- Use it to record awesome audio alongside video – Set your phone up with its camera recording your set, and use the EvermixBox 4 to provide pristine audio – you can record directly into your video recording software of choice (or just hit “record video” in your camera app) and it will work fine
- Use it as a livestreaming audio interface – It will work fine with any video production app, much like above, so you can use it as your audio source for phone-based livestreams too. It should also work fine with platform-specific livestreaming apps, like YouTube’s (copyright permitting, of course)
- Use it to digitise vinyl – While you can’t plug a turntable directly into it (its inputs are line level), as long as the turntable is going through a mixer or controller, it’ll work fine
- Use it as a desktop/laptop audio interface – The supplied USB-C cable will plug the unit directly into Macs, but curiously not Windows computers. So if you have a Mac, this can be your audio interface for that, too
Tech spec

Conclusion
Ultimately, the EvermixBox 4 is a high-quality audio interface, designed for DJs. It is stripped down to the basics, with a clean, simple app that gets pretty much everything a DJ would want done with their mix, done.
DJs have traditionally had to use audio interfaces meant for musicians, with lots of features they don’t need. This is far more suitable for what the majority of DJs need, and while not cheap at £115, is a reasonably priced solution, in a practical case that would make it easy to throw into your DJ bag and not worry about it till you need it.
Learn to DJ with Digital DJ Tips: The Complete DJ Course
One thing I would like to have seen is an “audio through” option so people DJing with a controller or device with only one set of outputs could use it, by plugging their speakers into the audio thru.
Also, I didn’t like the proprietary DIN cables – although Evermix does sell replacements cheaply from its site if you lose or break yours.
As for alternatives, there aren’t too many, but DJs wanting something along the same lines but slightly more feature-rich might want to also look at the iRig Stream.
Overall, the thoughtful app plus the very simple to use and well-made hardware means that for a lot of DJs, this could be all they need to finally start recording more mixes – something we think DJs should be doing a lot more of.
Want help choosing gear? Grab your free PDF: The Digital DJ Gear Buyer’s Guide


